votemotta2028


Absolutely—here’s (1) a tight research-backed plan for which optics to use and how to automate for repeatable, “perfect-every-time” solar cooking, and (2) a drop-in Hostinger webapp section (scoped CSS + namespaced JS) that estimates power, heat-up time, and prints a step-by-step “cook program” for your Solar Steak setup.
What lens/optic should you use?
Practical winners for cooking cast iron:
Large PMMA Fresnel lens (flat magnifier, e.g., 300–500 mm diameter).
Light, cheap, and can hit >350 °C focal temps with proper aiming; great for heating a black cast-iron pan rather than the food directly. ScienceDirect+1Parabolic dish (mirror) or Scheffler reflector.
Heavier/costlier but superb concentration and tolerant of wind; often used in fixed-focus cookers. MDPI
Why these work: on clear days, ground-level sun delivers ~1000 W/m² (“1 sun”) normal to the beam; your thermal power ≈ aperture area × 1000 W/m² × optical efficiency (0.6–0.8). Wikipedia+2PV Education+2
Targets for steak searing: a skillet surface around 400–450 °F (204–232 °C). You’ll get there faster when the pan is matte-black (absorbs) and the focal spot is tight and stationary. ThermoWorks
Automation: make it “set-and-sear” reliable
Sensors & control
Dual-axis tracker keeps the focal spot on the pan center (sun-following). Use PID/FOPID control on azimuth/elevation for stable pointing. ScienceDirect+1
Temperature feedback:
Thermocouple/IR sensor on the pan to hold setpoint (e.g., 230 °C before sear).
Controller “hunts” the focal spot around center or pulses a shutter/iris to avoid overshoot.
Safety interlocks: cloud dip or over-temp → auto shutter/defocus; lens cover when idle.
Mechanics
Gimballed mount for the lens/dish; pan stays fixed on a non-reflective, level platform.
Focal length: choose a lens with focal length ≈ 1–1.5× the lens diameter for a manageable working distance and small, hot spot. (Shorter f = hotter/shorter working distance; longer f = gentler, larger spot.)
Drop-in VMAG Webapp (Hostinger section)
Paste this in a single Embed Code block. It’s scoped to #m28-solar-cook, mobile-friendly, and namespaced (m28sc). It estimates power, heat-up time to searing temp, and prints a cook program you can hand to volunteers.
Heck yeah—here’s a clean, solar-cooking version of “perfect steak” that uses your Fresnel solar death ray safely and reliably. I’m giving you both the playbook and a copy-paste Hostinger section in your VMAG style.
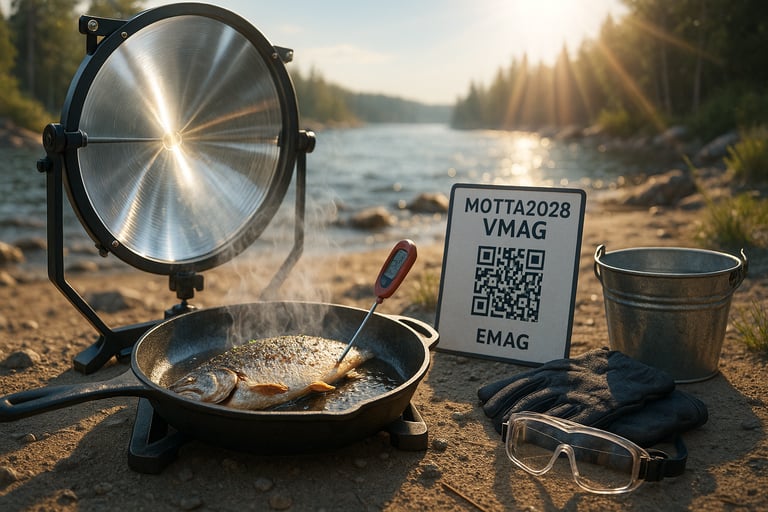
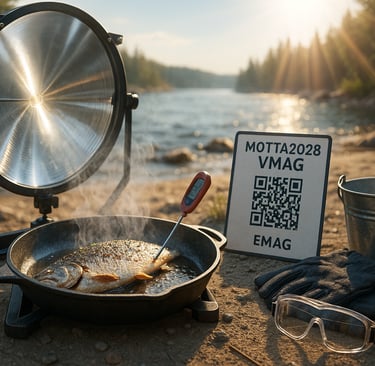
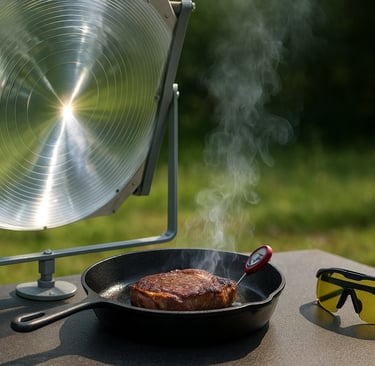
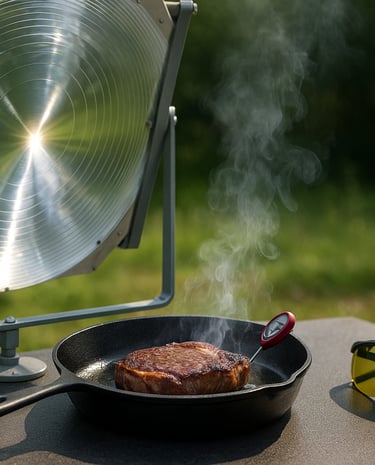
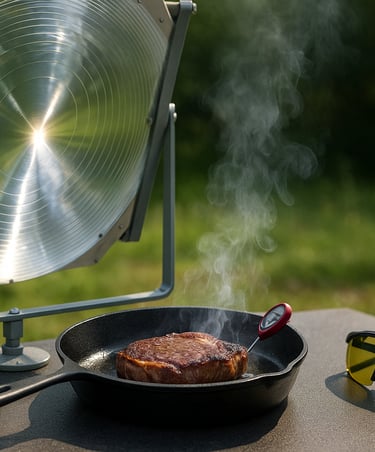
Field Playbook: Perfect Steak with a Solar Death Ray (Fresnel Lens)
Core idea
The lens is your searing burner.
For control, use a black cast-iron skillet (or matte-black carbon steel). You’ll heat the pan with the lens, not the steak directly.
For thick steaks, do a solar reverse-sear: bring the steak up gently first, then lens-blast the pan for that steakhouse crust.
Gear
Fresnel lens (handheld works; larger = faster)
Matte-black cast-iron skillet or griddle (no shiny surfaces)
Instant-read thermometer (non-negotiable)
Long tongs, heat glove, ANSI Z87+ eye protection
Small rack + tray (for resting)
Optional: solar box/oven or shaded area for gentle warm-up
Method A — Solar Reverse-Sear (most consistent)
Best for: 1½–2 in (4–5 cm) steaks (ribeye, strip, sirloin, filet)
Dry-brine (best): Salt all sides (½–¾ tsp kosher salt per side). Rest on a rack in the fridge 1–24 h, uncovered.
Solar warm-up: Set steak in shade or a solar box/oven at low gentle heat (or leave at cool ambient) until internal temp reaches:
95–100°F (35–38°C) for rare–med-rare
105–110°F (41–43°C) for medium
(This keeps total sear time short and pink edge-to-edge.)
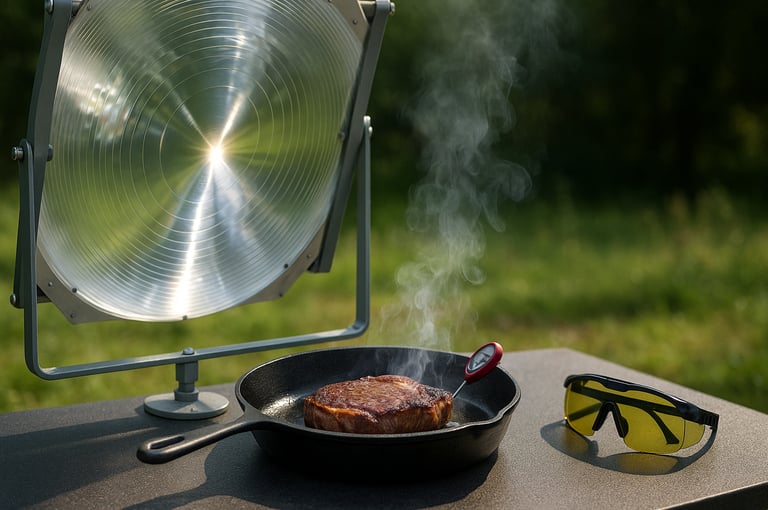
Preheat the pan with the lens: Place skillet on a stable, non-reflective surface. Focus the Fresnel spot on the center of the empty pan. In 2–5 minutes it should be ripping hot (a drop of water should dance). Keep your glasses on; don’t focus on polished metal.
Sear: Lightly oil the steak (or the pan), then:
Sear 30–45 s per side, flipping every 20–30 s to build an even crust without scorching.
Re-hit the pan with the lens between flips if heat drops.
Temp check & finish: Pull the steak when it’s 5–7°F (3–4°C) below your target. Rest on a rack 5–7 min to finish.
Pepper & butter (optional): Add fresh-cracked pepper after sear. A quick butter baste is fine, but remove the lens first (don’t focus on butter).
Method B — Full Solar Sear (thin cuts / quick cook)
Best for: 1–1¼ in (2.5–3 cm) steaks, skirt/flank
Prep: Pat dry, salt, optional light oil.
Pan preheat with lens to smoking-hot.
Fast sear: 45–60 s per side, flipping every 20–30 s.
Rest 5 min. Thin cuts carry over fast; don’t overshoot.
Doneness (pull temps → finish after rest)
Rare: pull 120–122°F (49–50°C) → finish ~125°F/52°C
Med-rare: pull 125–127°F (52–53°C) → finish ~130°F/54°C
Medium: pull 135°F (57°C) → finish ~140°F/60°C
Med-well: pull 145°F (63°C) → finish ~150°F/66°C
Tip: If clouds drift in, pause the sear and keep steak in a warm (not hot) shaded spot. Don’t let it linger between 40–130°F (4–54°C) for long—finish promptly.
Pro moves
Black cookware only: Matte black absorbs the lens heat; shiny pans reflect and waste it.
Flip often: The lens can create very hot zones; micro-flips prevent scorch stripes.
Dry surface = crisp crust: Moisture steams; pat very dry before sear.
Pepper last: Pepper burns at solar-sear temps—add after or right at the end.
Herb kiss off-heat: Butter/garlic/thyme after you remove the lens to avoid flare/spatter.
Safety (non-negotiable)
Eye protection: ANSI Z87+. Never look at the focal point.
Lens storage: Cover or face the lens down when not in use—accidental focusing hazard.
No reflective setups: Avoid mirrors/chrome/glass near the focal spot.
Stable base: Pan must sit level on a non-flammable surface.
Food safety: Use a thermometer; finish cooking the same session—don’t partially cook and hold in the danger zone.
Wind: Wind can blow the focal spot; shield or re-focus as needed.
Cut quick-picks
Ribeye: solar reverse-sear = elite; loads of fat, forgiving.
NY strip: loves hard, fast solar pan heat.
Filet: lean—hit target temp precisely; butter baste off-lens.
Skirt/Flank: blazing-hot pan, very short sear; slice against grain.
Drop-in VMAG Section (Hostinger-ready)
Paste this into an Embed Code block (scoped styles + namespaced JS, matches your storefront vibe):

Love this. Here’s a tight, field-ready playbook to spin up DIY gear for fishing, camping, rallies, and tailgates—stuff you can build, sell, and give away to grow Motta2028.
# Product lineup (DIY + sellable + giveaway-friendly)
## 1) Tailgate “Rally Crate” (flagship)
* What it is: A milk-crate sized kit that pops into a mini booth.
* Inside: fold-flat sign, QR “Join VMAG” panel, table cover, flag, clip-on LED bar, phone tripod, banner tape, zip ties, pens, clipboard.
* DIY cost: ~$38–$55; Target price: $89; Margin: 35–45%.
* Add-ons: magnetized donor board, “Share & SMS” QR card set (pre-printed).
## 2) Motta Mini-Grill “Solar Start” Kit
* Fresnel magnifier (hand size) + black fire starters, long tongs, welding-glove single, safety card.
* Pitch: “Light coals without lighter fluid—clean start.”
* Cost: ~$22; Price: $39; Margin: ~43%.
* Safety: card with eye/fire warnings, link to your VMAG demo.
## 3) “America First” Camp Lantern (USB-C + SOS)
* 2-in-1 rechargeable lantern/flashlight with red SOS, hook & magnet, USB-C charge.
* Cost: $10–$14 (bulk); Price: $25; Margin: ~50%.
* Add a peel QR ring: “Scan to join Motta2028 Volunteers.”
## 4) Paracord Survival Lanyard (tailgate/camping)
* 550 paracord bracelet OR neck lanyard with whistle + ferro rod + compass.
* Cost: $3–$5; Price: $12; Margin: high.
* Giveaway tier: free for first 25 sign-ups at each event.
## 5) Pocket Fish-Ready Kit
* Micro tackle box (hooks, sinkers, swivels), collapsible rod tip, 65 ft braid, snips, mini first-aid.
* Cost: ~$10; Price: $19; Bundle with hat for $29.
* Card insert: knot guide + QR to “Motta Outdoors VMAG.”
## 6) Tailgate Chair Back-Flag
* Universal sleeve that slides over folding-chair backs; double-sided print (flag + QR).
* Cost: ~$8–$10; Price: $19; Great stadium-adjacent branding.
## 7) Cooler Lid Topper (washable vinyl)
* 18×12” adhesive mat with your logo + “Spin to Win” QR.
* Cost: $6–$9; Price: $18. Throw into bundles as a value add.
## 8) “First Cast, First Vote” Hat
* Low-profile cap w/ woven patch + interior QR label.
* Cost: $6–$9; Price: $25; Bundle with Pocket Fish Kit.
## 9) VMAG Field Notebook
* Waterproof pocket notebook, dot-grid, pencil loop, quick-ref policies + QR to VMAG hub.
* Cost: $3–$4; Price: $12; Great as a volunteer freebie.
## 10) Stadium-Safe Clear Sling Bag
* Meets typical clear-bag rules (always check venue).
* Cost: $5–$7; Price: $20; Add “Volunteer Essentials” insert.
---
# Bundles (move units, keep SKUs simple)
* Tailgate Duo ($45): Lantern + Chair Back-Flag (+free sticker sheet).
* Outdoors Pack ($59): Pocket Fish Kit + Paracord Lanyard + Notebook.
* Rally Crate Pro ($109): Rally Crate + Cooler Topper + Hat (save ~$20).
---
# Freebie mechanics (best practices)
* Milestone freebie: “Every 250th email subscriber gets a Lantern.” Use simple counters at booth + online.
* Spin-to-Win VMAG: QR to a spinner page (3 chances/day): Stickers, Paracord, $5 coupon, 1 big weekly prize (Crate).
* UGC challenge: “Show your Motta tailgate setup.” Weekly pick wins a Solar Start Kit. Require #Motta2028 + page tag.
* Volunteer bonus: After 2 events worked, choose: Hat / Lantern / Fish Kit.
---
# Event activation flow (football games, rallies, campsites)
1. Flag + QR totem visible from 50 ft (chair back-flags + telescoping pole).
2. Demo loop: solar start on charcoal (day), lantern brightness demo (night).
3. Hands-on table: knot-tying card, paracord jig, mini tackle. Kids love it → parents linger.
4. Fast capture: 2 QR codes only—“Join / Volunteer”. NFC tags on table for quick taps.
5. Pick-n-Pay: one rolling case with clear price placards and bundle stacks.
---
# Micro BOMs (example)
Rally Crate
* Milk crate + lid: $9
* Fold-flat sign + QR print: $6
* LED bar (USB-C): $8
* Tripod (mini): $7
* Tape/zip ties/pens/clipboard: $8
Total: ~$38
Pocket Fish Kit
* Micro box: $2
* Hooks/sinkers/swivels assortment: $3
* 65 ft braid: $2
* Snips: $2
* Mini first-aid: $1
Total: ~$10
---
# Store & logistics
* SKUs: Keep to 8–12; bundle to add variety without inventory chaos.
* Packaging: Kraft mailers + QR insert. Include safety card for anything heat/fire/sharp.
* Barcodes: Generate Code-128 on labels; use a free POS app for events.
* Payment: QR to Stripe Link / PayPal. Offline backup: Square reader.
* After-purchase flow: Auto SMS: “Thanks! Reply YES to get event alerts + giveaways.”
---
# Legal / safety notes (lightweight)
* Giveaways: Post simple rules page (eligibility, odds, start/end, how to claim). One page covers recurring promos.
* Disclaimers: For Solar Start—eye/fire warnings; for knives/hooks—adult use; for paracord—non-load bearing.
* Venues: Clear-bag rules and canopy/tent restrictions vary—check ahead; avoid cooking inside restricted zones.
---
# Marketing hooks (copy you can steal)
“*First Cast, First Vote.** Grab your Pocket Fish Kit—scan to join the Motta Outdoors VMAG.”
“*Light it right.** Solar Start: cleaner coal ignition. No lighter fluid.”
“*Tailgate → Take Action.** Rally Crate in stock—build your booth in 90 seconds.”
“*Volunteer & win.** Every 25th sign-up gets a Lantern on the spot.”
---
# Your growth loop
Each product has a *visible QR** to one of three funnels: Join / Volunteer / Donate.
Every QR lands on a *VMAG page** with:
* 30-sec video, one CTA, spinner giveaway.
* “Find the shop later” button (SMS link to self).
* Social proof carousel (UGC tailgates).
---
If you want, I’ll drop a single-file storefront VMAG with:
* product cards (the 10 above),
* a cartless “Pay via QR” flow,
* a giveaway spinner,
* and a volunteer capture modal.
Got it. Here’s the clean, field-ready explainer you can drop into your VMAG copy (and use at the booth) — how the “solar death ray” (Fresnel lens) lights charcoal, why the black charcoal “trigger” matters, what “over-unity” really means, plus 10 useful/safe things you can do with a solar concentrator + charcoal.
# How the solar “death ray” lights charcoal
What’s happening:
Midday sun delivers ~*1000 W/m²** at ground level.
A *Fresnel lens** (or parabolic mirror) with area A collects ∼**1000×A watts** of solar power.
Example: a letter-size Fresnel (~0.06 m²) can concentrate *~60 W** into a small spot.
When you focus that energy onto a *dark, non-reflective target** (charcoal), most light is absorbed and turned into heat.
Charcoal’s surface heats quickly; when it reaches *~300–500 °C** (depends on airflow and moisture), it smolders → ignites, and then the rest of the pile catches as heat spreads.
Why charcoal works as a “trigger”:
It’s *already black** (high absorptivity), converting light to heat efficiently.
It’s *porous**, so once an ember forms, air can feed it.
It’s *chemically ready** (carbon with residual volatiles), so you don’t need lighter fluid — the lens provides the ignition heat.
---
# DIY: The “Charcoal Trigger” method (quick field steps)
Gear: Fresnel lens (hand-size works; bigger = faster), welding glove (one), long tongs, ANSI Z87+ glasses, water + metal bucket, small dry charcoal, optional black fire-starter puck.
1. Build a peak: Make a small pyramid of charcoal. Put a single “trigger” piece on the top (either a black starter puck or a small lump rubbed in soot).
2. Focus hard: Hold the Fresnel 4–10 in (10–25 cm) above the trigger. Move in/out until the bright spot is the smallest, sharpest dot.
3. Hold steady (10–60 s): You’ll get smoke → glowing red spot. Don’t stare at the focal point; keep glasses on.
4. Feed the ember: Use tongs to drop one or two dry chips over the ember. Let air in — don’t smother it.
5. Grow the fire: Once center coals ash over, add charcoal gradually.
6. Shut down safely: After the demo, water + stir in a metal bucket until cool.
Pro tips
* Dark target = faster heat. If pieces look gray/reflective, pre-blacken a tiny chip with soot and ignite that.
* Airflow matters. A gentle breeze helps; strong wind will blow the focal spot.
* Midday is king. Best results within ±2 hrs of solar noon; avoid long shadows/clouds.
---
# Reality check on “over-unity”
“Over-unity” = a device outputs more energy than it takes in. That would violate energy conservation. No one has demonstrated a reproducible, peer-reviewed over-unity device. A solar concentrator is not over-unity — it’s just gathering existing solar energy and concentrating it into a small area (like a magnifying glass). You can show impressive heat without making any energy-creation claims. Label any wild ideas “experimental / education only.”
---
# 10 useful, safe(-ish) things to do with a solar concentrator + charcoal
Use common sense, eye protection, and local burn rules for every item below.
1. Fluid-free charcoal start (your flagship demo)
* Exactly as above. Great daytime crowd-pleaser; no fumes from lighter fluid.
2. Camp kettle heat-assist
After ignition, set a *small kettle** next to the glowing mound to pre-warm water for coffee/tea. (Do not aim the lens at reflective steel; heat via the coals.)
3. Char-cloth maker (micro tin)
Place cotton scraps in a *vented mint tin** on the coal bed for 5–10 min. You’ll create char-cloth — catches sparks easily for future fire-starts.
4. Biochar sample puck
Once coals are going, smother a *cup of wood chips** in a vented can, then quench. You’ve made a small biochar sample for soil amendment demos.
5. Soot-black “thermal target” chips (giveaway)
Use the coals to *soot-blacken** a handful of small wood or clay chips. Bag and give them out as ready-to-ignite targets for future solar demos.
6. Thermo-drawing (education)
On a *scrap of matte ceramic tile** dusted with a pinch of charcoal, sweep the concentrated spot to trace lines (soot changes appearance/adhesion). Kids see how focus = heat.
7. Mini rocket-stove assist
Ignite a tiny *rocket-stove** feed with the lens (charcoal trigger inside the burn chamber). Teaches efficient combustion without paper.
8. Ferro-rod hybrid start
Show *two clean methods**: solar ignition first; if clouds roll in, use a ferro rod to land sparks on your char-cloth (made in #3). “Redundancy” lesson.
9. Thermal camera contrast demo
If you have a small thermal imager, show *black vs. shiny** surfaces near the focal spot (not in the spot) to visualize absorptivity/emissivity concepts.
10. Safety drill: extinguish & ash check
Make the end of your demo a *ritual**: quench coals in a metal bucket, stir, verify no heat with back-of-hand above the bucket. Teach impeccable leave-no-trace.
---
# Best-practice safety (copy on your card)
* Eyes: Wear ANSI Z87+ glasses. Never look at the focal point.
* Gloves & tongs: Hot hardware = burns; keep a welding glove on the lens hand.
* Surface: Only on grills/fire-safe pits or bare mineral ground.
* Wind & reflectors: Avoid mirrors, chrome, glass near the focal spot.
* Water + metal bucket: Within arm’s reach; cool to touch before disposal.
* Rules: Honor burn bans and venue restrictions. Daytime demo only.
* **Storage:** Cover or invert the Fresnel lens when not in use (accidental focusing hazard).
---
# Pocket FAQ (for the booth)
Q: Why won’t it light instantly?
A: Clouds, poor focus, damp fuel, or a gray/shiny target. Shrink the bright spot, use a black target, and give it 10–60 s.
Q: Is this “free energy”?
A: No. It’s free fuel (sunlight), not free energy creation. We’re concentrating existing solar power.
Q: Can I cook with the lens directly?
A: Don’t aim at shiny cookware. Use it to ignite charcoal or heat a blackened pot designed for solar cooking, and keep strict fire control.
---
If you want, I can drop this as a ready-to-paste “Solar Start FAQ” card in your section (same styling as the storefront), or wire a one-tap print sheet (PDF) with the steps, safety gate, and the 10 ideas.


Awesome brief, Robert. Here’s a clear, soup-to-nuts plan to use AI to design a photoreal “2028 Dome” inspired by Vegas’ Sphere, plus how to make the inside interactive with spatial audio and your Primer-Field-style magnetic array art—wrapped in a pro-MAGA / pro-MAHA / pro-President-Trump visual kit.
1) First things first: what you can (and can’t) use
Don’t reuse Sphere’s brand art without permission. The Sphere’s visuals, footage, and trademarks are protected; their terms restrict reuse and derivative works. Use your own photography/footage or create a look-alike (original design) instead. (Sphere Entertainment Co.)
Facts you can aim toward while you design: Sphere’s interior LED is ~160,000 sq ft at ~16K wraparound; their HOLOPLOT system drives ~167,000 individually-amplified drivers with beamforming/WFS. These are useful reference targets for fidelity—not assets to copy. (EE World Online)
2) Make the photoreal exterior (AI + 3D)
Option A — Pure 3D concepting (fastest)
Text → concept art: Midjourney / SDXL / Adobe Firefly prompts for “presidential 2028 dome, polished white composite panels, brushed titanium ribs, programmable exosphere LEDs.” Generate 6–12 angles (day/night, rally crowd, aerial).
Upscale + fix: Topaz/Adobe upscaler + Photoshop Generative Fill to clean seams, signage, etc.
Modeling: Block the dome in Blender or Cinema 4D; use Geometry Nodes / MoGraph to lay LED tiles and ribs.
Materials: PBR (metal/clearcoat, subtle AO). HDRI sky for reflections.
Option B — Reality-grade geometry (harder, most real)
Capture your own photos/video of domes/arenas or a foam/3D-printed maquette you build.
Reconstruct with NeRF / Gaussian Splatting (Nerfstudio + gSplat). You’ll get a photo-faithful mesh/point cloud you can retopo for Unreal/Three.js. (LearnOpenCV)
3) Build the “Exosphere” look without copying
Create a programmable LED shell shader (Unreal “material function” or Three.js custom shader) with:
LED puck grid (UV-mapped discs), brightness rolloff, scanline shimmer.
Content mapper: feed image/video layers (logos, rally countdown, news tickers).
Performance target: at least 4K x 2K for web demos; higher in offline renders. (Sphere runs far beyond this; you’re imitating the vibe, not the spec.) (EE World Online)
4) Make the inside: 16K-feel wrap + interactivity
Game engine route (richest)
Unreal Engine 5
Use the UV-unwrapped inner dome with a single panoramic material that accepts 8K–12K equirect video (or tiled 4× 4K).
Add MetaSounds + Wwise for interactive audio routing, beat-sync, haptics cues.
Trigger “rally moments,” fireworks, donor shout-outs, policy cards via UMG/Blueprints.
Unity alternative: Cinemachine + Timeline + FMOD for sound.
Web route (fast to publish on Hostinger)
Three.js + WebGL/WebGPU: skybox/equirect shader mapped to the inside of a sphere; scroll or mouse to pan; clickable “Policy Pods.”
Web Components for your “VMAG” tabs, donor buttons, share strips.
Lazy-load textures, use KTX2 for GPU-compressed panoramas.
5) Spatial & interactive sound (head-tracked and room-sim)
Sphere-style beamforming is hardware-specific, but you can simulate the experience with:
Web Audio API (browser): PannerNode, ConvolverNode (binaural IRs), listener orientation tied to cursor/gyro. (MDN Web Docs)
Unreal/Unity: Binaural plugins (Steam Audio, Oculus Spatializer) + HRTF; event-driven stems (crowd, music bed, voice-of-Motta, sfx).
Inspiration: Sphere’s HOLOPLOT uses 3D audio beamforming/Wave Field Synthesis and hides speakers behind the LED plane—use that as a sound-design north star (precise localization, uniform coverage, no visible speakers). (holoplot.com)
6) Primer-Field / LaPoint magnetic arrays as art features
Treat these as interactive sculptures (not physics claims):
Visuals: Arrays of toroidal emitters along meridians. Animate field lines with curl-noise and particle advection (Unreal Niagara or Three.js GPGPU).
Interactivity: Visitors trigger “flux blooms” with cursor/touch; music modulates line density and particle velocity.
Safety: If you ever use real magnets for physical installs, follow engineering guidelines for field strength, spacing, and pacemaker/implant safety signage.
7) “Frequencies for healing” — safe, non-medical usage
You can absolutely build wellness soundscapes and label them as relaxation/meditation content (avoid medical claims). Common creative bands used in audio design:
Delta: 0.5–4 Hz (deep calm/slow pulses)
Theta: 4–8 Hz (drifty, meditative textures)
Alpha: 8–12 Hz (restful, focus)
Beta: 13–30 Hz (alert, energetic)
Gamma: 30–80 Hz (sparkly overtones)
Implement with binaural beats (headphones) or isochronic pulses (speakers). Provide a clear disclaimer: “Not medical advice; not a treatment or cure.”
8) Pro-MAGA / Pro-MAHA / Pro-Trump style kit
Palette: Navy #0B1220, Deep Blue #0F172A, Patriot Red #B91C1C, Flag White #F8FAFC, Accent Electric Cyan #22D3EE, Accent Victory Green #10B981.
Typography: Headlines—Bebas Neue/Oswald; Body—Inter/System UI.
UI Motifs: Bold banners, rally-countdown clocks, “Big Red Donate” button, “Policy Tabs,” ticker with “Paid for by MOTTA 2028.”
Scene beats: Opening fly-through from exosphere → concourse → interior LED reveal with policy reel; crowd chant stem rises; “America First Innovation” card animates in.
9) Your production pipeline (weekend-ready)
Moodboard & prompts → generate 12–24 concept frames (day/night/rally).
3D blockout in Blender → dome, concourse, stage, LED tile pattern.
Look-dev → shaders for exosphere + interior wrap, crowd billboards.
Audio design → 5–7 stems (anthem, crowd, VO, FX, wellness bed).
Unreal (desktop) or Three.js (web) scene with interactive hotspots.
Export
Web: one HTML file + /assets (KTX2 textures, MP4/H.265 videos, AAC/Opus audio).
Video: UE movie render queue to ProRes/H.264 for trailers.
Host on Hostinger: drop into your /vmags block; lazy-load, defer scripts; pre-compress with brotli.
10) Feature ideas to ship now
Rally Mode: crowd density increases with scroll; voice-of-Motta localized to camera; fireworks synced to snare hits.
Policy Pods: tap a glowing orb → open card with bullet points + CTA.
Mag-Array Garden: user drags a slider to “increase flux,” particles form a flag-shaped flow.
Wellness Intermission: 90-second alpha/theta mix while patriotic aurora waves on the dome.
Creator VMAG slot: embed playlist (Ken Wheeler / LaPoint / Ashton Forbes) in a “Research Dock” tab.
Useful references on specs (for your inspiration targets)
16K-class interior wraparound LED (~160,000 sq ft). (EE World Online)
HOLOPLOT/“Sphere Immersive Sound” with ~167,000 drivers; beamforming/WFS. (Sphere Entertainment Co.)
Recent coverage of Sphere deployments & shows (for creative cues). (AVNetwork)
Web spatial audio how-tos (browser). (MDN Web Docs)
Terms reminding you to use original art/footage (avoid brand/IP reuse). (Sphere Entertainment Co.)
Want me to turn this into a single-file VMAG (copy-paste HTML) with:
a rotatable inside-the-dome WebGL view,
sound on/off + wellness intermission button,
Policy Pods and Rally Mode, and
your branding kit baked in?
Say the word and I’ll ship the page, ready for Hostinger’s HTML block.


Got it. Here’s a tight breakdown of what he’s doing in your transcript, followed by a practical DIY plan with parts, rough costs, and where to get everything.
What the transcript is showing (quick explainer)
Concept: A bowl-shaped magnet array (from LaPoint’s “Primer/PrimerCube” work) set so a short “slug” of seven axially-magnetized N42 discs (3/8″ × 1/4″) shoots through a 10 mm ID / 14 mm OD clear tube that passes the bowls. As the moving magnets pass a copper coil (~400 turns, ~24 AWG/0.5 mm) they induce a voltage spike you can see on an oscilloscope and (barely) light an LED.
Why 7 magnets? He says other counts either make less voltage or stick in the array.
Key tunables:
Bowl orientation and spacing (~60 mm between bowls was “best” in his demo).
Coil turns (more turns → more volts but more drag → can stall the slug).
Coil distance from the bowl (too close reduced output in his tests).
Measurements shown: Single-pulse peaks ~±2.4 V initially, up to ~5–6 V after spacing tweaks—still only momentary pulses, just enough to flicker LEDs.
Important caution: He frames this as an “over-unity” demo, but his own data are brief pulses, not sustained net power. Treat this as an interesting magnet/induction experiment, not a proven free-energy device.
DIY build: parts, sources, and ballpark cost
(U.S. retail, single-unit pricing—buying bulk is cheaper.)
Magnet array bowls (printable)
Files/guide: PrimerCube manufacturing guide + “Technology Transfer” reference (includes bowl geometry and build notes). (Squarespace)
3D models (community): Printable bowl array for 3/8″×1/4″ magnets. (Thingiverse)
Cost: Filament or print service ($10–$40 per bowl depending on service/size).
Magnets (slug + bowl pockets)
N42 discs, 3/8″ dia × 1/4″ thick, axially magnetized (LaPoint’s stated size). Options:
K&J Magnetics D64 (N42). ~$1.15–$1.85 each depending on qty. (K&J Magnetics)
totalElement 24-pack (same size/grade). ~$22–$30 per 24. (totalElement)
Counts:
Slug: 7 magnets.
Each bowl: depends on your model (commonly ~40 pcs per bowl). Check your STL’s bill of magnets. (Thingiverse)
Clear tube (projectile guide)
10 mm ID × 14 mm OD clear PVC/PETG tube (PC water-cooling parts are perfect and straight). ~$15–$30 depending on length/pack. (Titan Rig)
Pickup coil
Magnet wire 24 AWG (≈0.5 mm), heavy-build enamelled copper. $12–$25 for small spools; bigger spools cost more. (Remington Industries)
Wind ~400 turns on a 10–15 mm former. Keep coil centered on the tube, not pressed against the bowl.
Indicators & measurement
5 mm white LEDs (forward V ~3.0–3.2 V @ 20 mA). $5–$15 per pack. (Adafruit)
Oscilloscope (budget USB): Hantek 6022BE (2-ch, 20 MHz). ~$60–$100. (Amazon)
(Optional) Force gauge to replicate “push-through” force comparisons (grams/Newtons). $25–$500+ depending on accuracy. (Jonard Tools)
Rough one-loop cost (DIY print, 2 bowls):
Magnets: 2×(≈40 each) for bowls + 7 for slug ≈ 87 pcs → ~$100–$160 (qty pricing matters). (K&J Magnetics)
Printing/service: $20–$80 (two bowls). (Thingiverse)
Tube: $15–$30. (Titan Rig)
Wire: $12–$25. (Remington Industries)
LEDs/misc: $10–$20. (Adafruit)
(Optional scope: $60–$100). (Amazon)
Subtotal (no scope): ~$160–$295 depending on sources/quantities.
Build steps (condensed)
Print the bowls from the STL(s). Deburr pockets so magnets sit flush. Follow general geometry notes in the PrimerCube guide. (Squarespace)
Load bowl magnets per the pattern (check your model’s polarity map); consistent axial orientation is critical. Tape or epoxy in place. (Thingiverse)
Mount tube so it passes centrally through the bowls. Start with ~60 mm bowl-to-bowl spacing; adjust later. (That spacing is what he called “optimal” in the demo.)
Wind coil: ~400 turns of 24 AWG on a short bobbin that slides over the tube. Solder flying leads; leave enough slack to shift coil position. (Remington Industries)
Make the slug: Stack 7× 3/8″×1/4″ N42 discs, same axial orientation, and lightly tape the stack so it doesn’t separate on impact. (K&J Magnetics)
Initial tests
Place two tape marks 46 mm apart on the tube (as a consistent “launch distance” reference).
Try both bowl orientations. One direction needed ~1064 g to start and shoots higher; the other needed ~362 g and tends to maintain/increase speed through multiple bowls in his video. Watch voltage spikes across your coil/LED. (If you’re quantifying, use a force gauge.)
Tuning
Slide the coil away from the bowl lip if voltage drops when they touch—he observed reduced output when the coil was pressed right against the array.
Try 350–600 turns. More turns → higher V but more magnetic drag; you can stall the slug before the next bowl.
Adjust bowl spacing around 60 mm; too wide and the slug slows/stops.
Closed-loop experiment (advanced): Form a gentle loop of tube so the slug can circulate. Add spacers between multiple slugs so they don’t clump, and add multiple coils around the loop for more pulses. (This is demonstrative only; don’t expect steady net power.)
Safety & sanity notes
Magnet pinch & shards: N52/N42 discs can snap together and chip. Wear eye protection; keep away from pacemakers and magnetic media.
Electrical: Pulses can exceed LED forward voltage. Use a series resistor (e.g., 150–330 Ω) when LED-testing to protect it.
Claims: “Over-unity” isn’t supported by mainstream physics. Treat this as an EM induction and magnetostatics demo, not a power source. Replicate carefully, measure honestly.
Handy references & links
PrimerCube guide / “Technology Transfer” pointer (background, manufacturing notes). (Squarespace)
3D bowl model (community) with 3/8″×1/4″ pocket spec. (Thingiverse)
Magnets (3/8″×1/4″ N42 axially): K&J (D64) and totalElement pack options. (K&J Magnetics)
Clear tubing (10 mm ID / 14 mm OD): PETG/PC water-cooling tube or clear PVC. (Titan Rig)
Magnet wire 24 AWG: Remington / BNTECHGO / high-temp alternatives. (Remington Industries)
LEDs (5 mm white, ~3 V): Adafruit / LEDSupply / PiShop packs. (Adafruit)
Budget oscilloscope: Hantek 6022BE (USB). (Amazon)
(Optional) Force gauges for repeatable “push-through” tests. (Main Website)
If you want, I can package this as a single Hostinger-ready embed (clean HTML/CSS/JS) with a parts table, polarity diagram placeholders, and a tiny data-capture panel for your scope readings.